Norm's Web Pages
PowerBook Picture Box
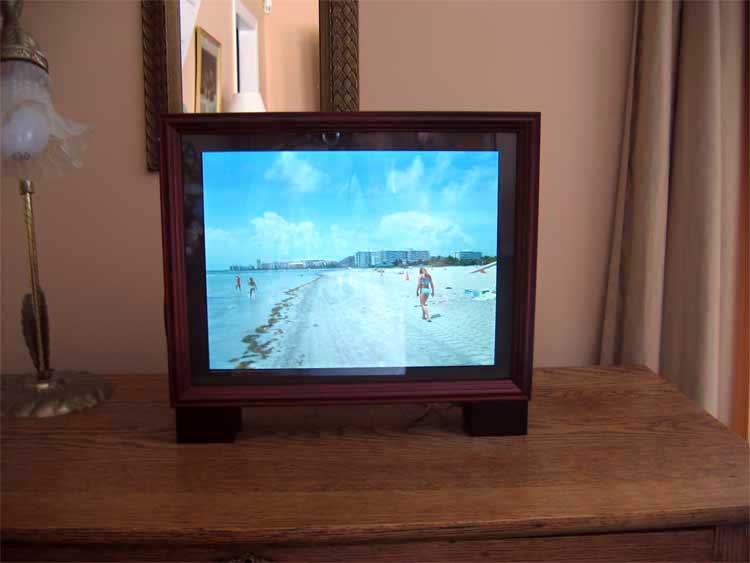
My sister gave me her old Apple PowerBook G3 Series (Wallstreet) laptop when she upgraded to a G4 notebook. Since this unit only had 192MB of RAM and a slow 250 MHz processor, it was not getting used. So I decided to convert it into a picture box to dynamically display photos I have stored on my Blue & White G3. There are several examples of picture boxes from laptops, but none that met my requirements below.
Requirements
I established the following requirements for this picure box:- It had to be wireless so I had the flexibility to put it anywhere there was a power outlet.
- It had to automount a folder/disk on my Blue & White G3 which I use as a server. I wnted to be able to change an alias in my "Slideshow" folder any time and point it to a new set of photos without having to move files to the PowerBook.
- It had to have the keyboard and power button easily accessible in case I needed it (I do).
- I wanted an commercially available unobtrusive finished picture box. I could have built one, but that would have taken too much time.
Solutions
- I could have used OS9 and an unsupported driver for my wireless card, but I decided to use OSX since the Belkin F5D7011 802.11g wireless card works without any additional software or drivers (It is recognized like an Airport card).
- I chose 10.3.9 as it allowed me to have the server folder mount automatically and the built-in screen saver could access the mounted folder.
- I used XPostFacto to install OSX 10.3.9 on this machine since it is not suppotrted by Apple.
- I bought a 10" x 13" picture box. Unfortunately, the powerbook is about 3/4" wider than 10", so I had to cut the case. That required dismantling the powerbook entirely from it's case. I used the take-apart manual from PowerBook Medic.
Before I took the unit apart to mount in the picture box, I made sure everything was working first.
PowerBook Software Preparation
Unfortunately, Apple decided to not support this laptop in OS X versions later thjatn 10.2. In order to get 10.3.9 to work on this machine, I had to install XPostFacto, a neat shareware package that allows you to install modern versions of OS X on legacy machines. However, I learned to NOT use the cache extension as the machine would not boot if it is installed. I also ran into the well know problem with these machine and OSX where the screen goes dim when the OSX boot window disappears. I got around that by installing OS9 on the machine and booting in OS0, then using XPostFacto to boot into OSX. Once I did that I could boot into OSX directly, the machine found my wireless access point and the server disk mounts. Now it was time for surgery.
PowerBook Hardware Preparation
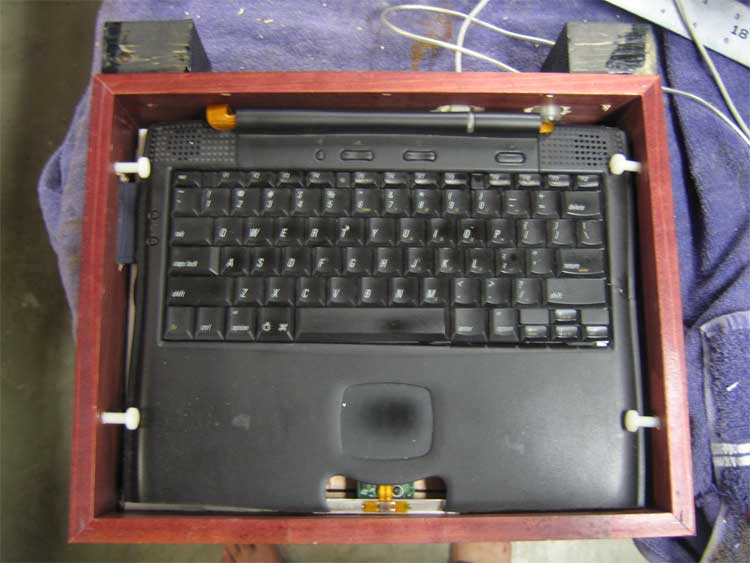
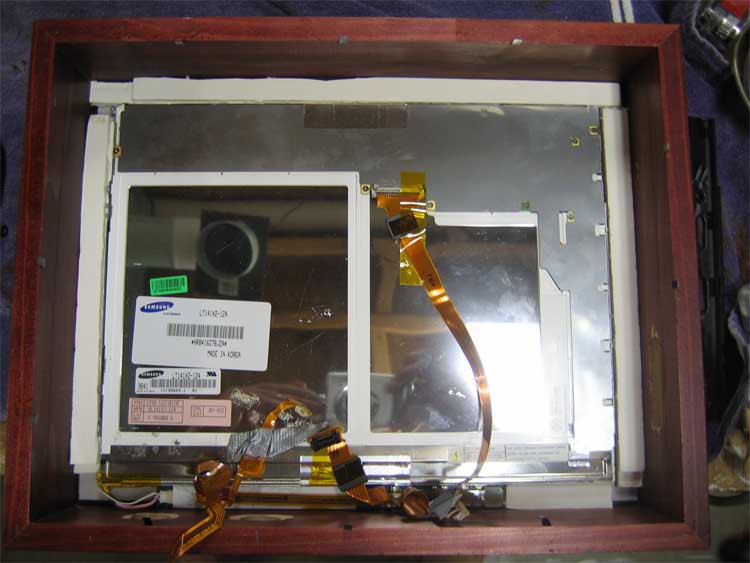
Below you can see the screen and inverter board removed from the top and the trimmed bottom case. I had to remove the plastic button but I kept the mounting screws and the actual mouse button. I put the unit back together as much as possible so I had tghe functionality of the keyboard and the control buttons. Notice the cord for the apple mouse. I use a mouse with the assembled picture box so I can see the screen. I had to remove the battery and CD-ROM.

Here is a shot of the back of the picture box with only the screen installed. I had my local framing shop make a grey matt for the screen. I used foam board to mount the screen. This stuff work great for custom fitting the screen and mounting it in a cushion, but I had a devil of a time with the tiny foam particles getting between the screen and the picture box glass.
Here is a picture with the PowerBook body installed. Note the nylon screws holding the machine in the box. Also, I had to drill holes for the power adapter and the mouse as well as the wireless card. I had make block feet to accommodate the cords coming out the bottom of the frame.